


Web3 has been recently gaining a lot of attention, and many new developers are jumping into this new sector. NFTs and DAOs have also been getting lots of traction lately. Today, I will show you how to mint your own NFT using Next JS!
I will be using TypeScript in this article, but if you are using JavaScript, simply remove the type annotations and you'll be good to go.
Setting Up
The Frontend
Create a new Next JS project with Tailwind CSS
npx create-next-app --example with-tailwindcss with-tailwindcss-app # npm
yarn create next-app --example with-tailwindcss with-tailwindcss-app # yarn
Install the following dependencies:
npm i @3rdweb/hooks @3rdweb/sdk ethers uuid react-hot-toast # npm
yarn add @3rdweb/hooks @3rdweb/sdk ethers uuid react-hot-toast # yarn
The Thirdweb Project
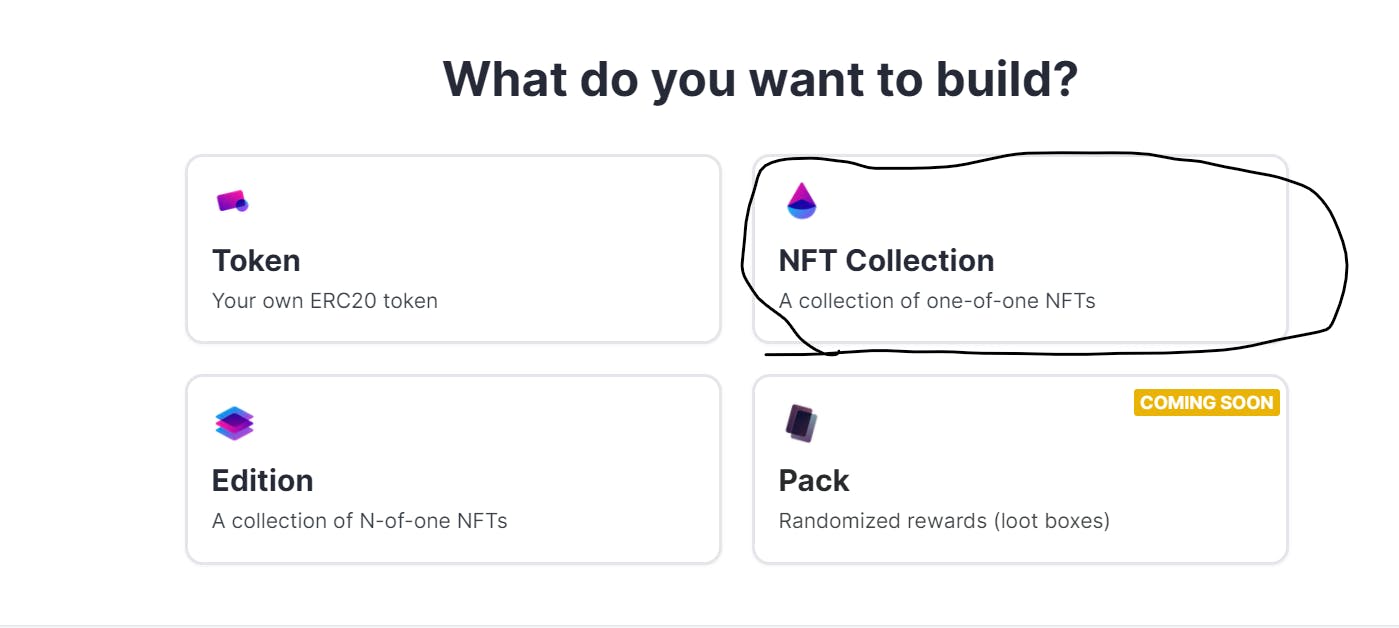
Go to Thirdweb's website and connect your wallet (I will be using Thirdweb v2, which is still in preview). Then create a new contract. When it asks you what network you will build your project on, select the Rinkeby network under the Testnet section. This makes sure we aren't using real Ethereum.
Then select the "Create NFTs and Tokens" button and hit the NFT collection button.
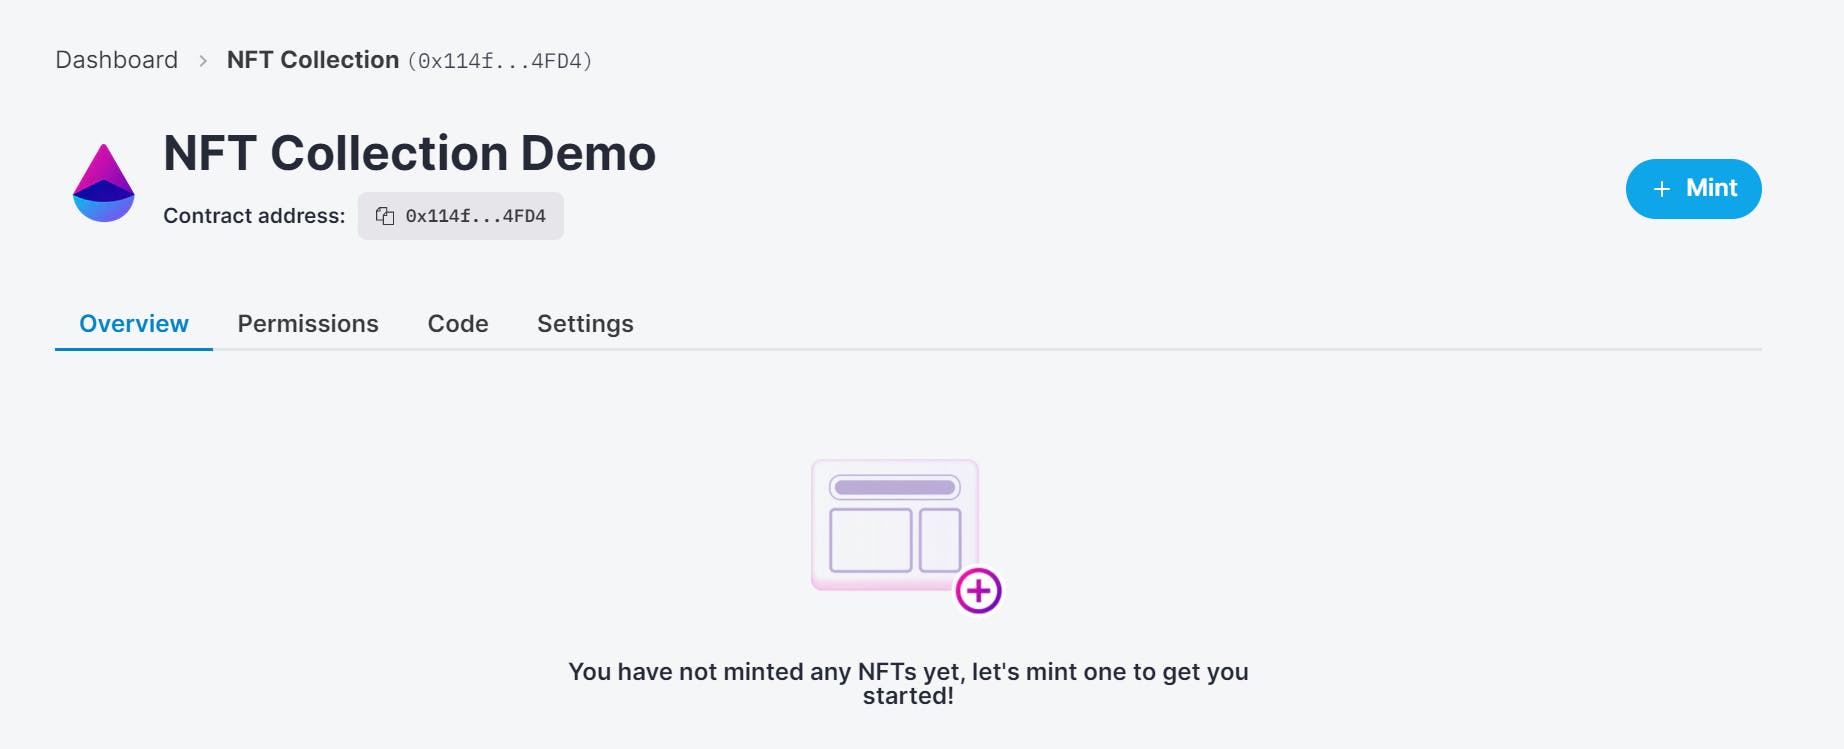
Name your collection (I named mine "NFT Collection Demo") and hit deploy. Sign the transaction they ask you for (they will take a minor gas fee), and you should have a ready to go smart contract that you deployed with Thirdweb!
If you don't have enough ether for the transactions Thirdweb will ask you to authorize, click here to get free test ether.
The Alchemy Project
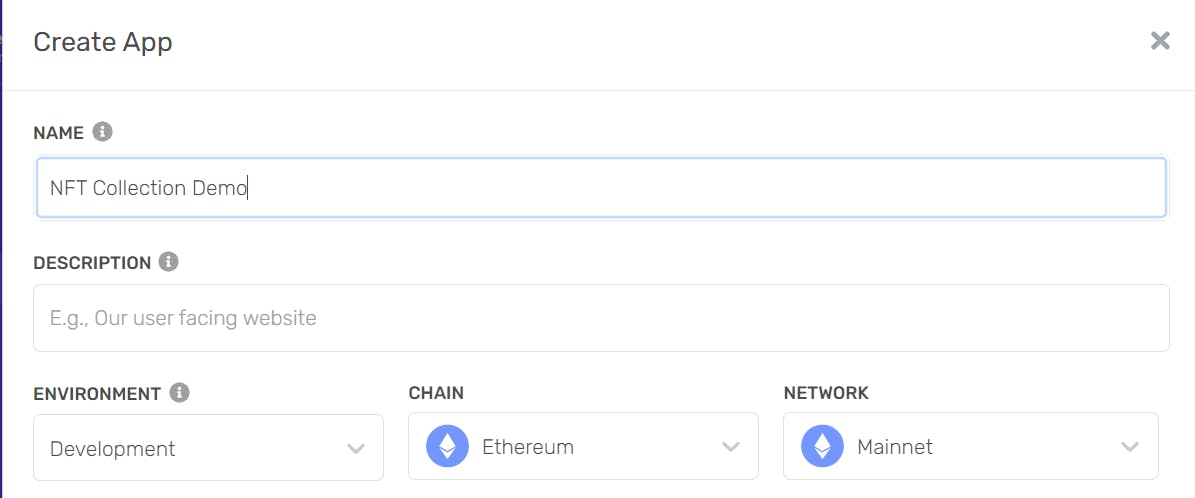
Go to Alchemy's Website and create an account if you haven't already. Then create a new app. You can name it whatever you want, but make sure the environment is "Development", the chain is "Ethereum", and the network is "Rinkeby".
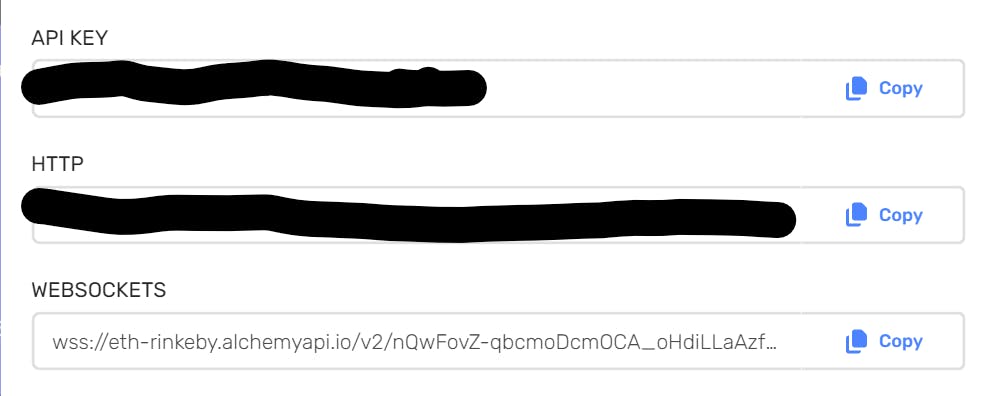
Once you have created the app, go into it, and click "View Key". Then copy the HTTPS key and save it for later; we will need it!
Building the App
Authentication
First, we need to wrap our app with a Thirdweb provider so we can use the library. Go to the _app.tsx file and add the following code:
const supportedChainIds = [4];
const connectors = {
  injected: {},
};

function MyApp({ Component, pageProps }: AppProps) {
  return (
    <ThirdwebWeb3Provider
      supportedChainIds={supportedChainIds}
      connectors={connectors}
    >
      <Component {...pageProps} />
    </ThirdwebWeb3Provider>
  );
}
The supported chain IDs array basically says what networks do you want the user to login from. 4 represents the Rinkeby test networks. The connectors object represents how you want the user to login (MetaMask, Coinbase, etc.). The injected property is for MetaMask.
Now to allow the user to connect their wallet, we can create a component for our button. Create a directory called components, and inside create a new file called Connect.tsx. Inside, paste the following code:
import { NextComponentType } from "next";

const Connect: NextComponentType = () => {
  return (
    <div>
      <a className="inline-block rounded-full bg-gradient-to-r from-pink-500 via-red-500 to-yellow-500 p-[2px] hover:text-white focus:outline-none focus:ring active:text-opacity-75">
        <span className="block rounded-full bg-white px-8 py-3 text-sm font-medium hover:bg-transparent">
          Connect Wallet
        </span>
      </a>
    </div>
  );
};

export default Connect;
It is basically just a fancy button that says connect wallet. To implement the functionality for that button, you need to use the useWeb3 hook that Thirdweb provides. You can pull it in like this:
const { connectWallet } = useWeb3();
That pulls in the connectWallet function from the hook. Now we can add an on click listener to the button so that whenever it is clicked, we can connect the user using their MetaMask wallet:
<a className="..." onClick={() => connectWallet("injected")}>
  ...
</a>
Now you should see a popup for MetaMask asking you to authorize the website to use your wallet.
We can now conditionally render the page so that if your wallet is connected, the minting button (which we will create) will appear, otherwise the connect wallet button will be there. This can be accomplished with the address property from the useWeb3 hook.
// get the address of user's wallet
const { address } = useWeb3();

// if it exists, render the mint component, otherwise the connect component
{
  address ? <Mint /> : <Connect />;
}
The Mint Button
Now we need to create the mint button. Create a new component called Mint.tsx and paste the following code:
import { NextComponentType } from "next";

const Mint: NextComponentType = () => {
  return (
    <div>
      <a className="inline-flex cursor-pointer items-center rounded border-2 border-[#3b5998] bg-[#3b5998] px-5 py-3 text-sm font-medium text-white transition-colors hover:bg-transparent hover:text-[#3b5998] focus:outline-none focus:ring active:opacity-75">
        Mint a Cool Robot
      </a>
    </div>
  );
};

export default Mint;
It is another fancy button that says "Mint a Cool Robot". You can say whatever you want, but I said robot because we will be using a random robot picture from Dicebear to mint the NFT. Anyway, let's create an asynchronous function that will be called whenever we press the mint button.
const mint = async () => {};
Then we can add an on click listener to the button:
<a className="..." onClick={() => mint()}>
  Mint a Cool Robot
</a>
Now for our mint function, we will send a POST request to an API endpoint we will create. In the body of the request, we will send the address of the account that wants the NFT (get it from the web3 hook). So basically it would look like this:
const { address } = useWeb3();

const mint = async () =>
  await fetch("/api/mint", {
    method: "POST",
    headers: {
      "content-type": "application/json",
    },
    body: JSON.stringify({ address }),
  });
The API Endpoint
Now we need to create a new API endpoint. Go into the api directory in the pages directory and create a new file called mint.ts. This is where the we will mint the NFT. Paste in the following code:
export default async function handler(
  req: NextApiRequest,
  res: NextApiResponse
) {}
This is where we will write all the logic. First we need to get the account address from the request body.
const { address } = req.body;
Now we need to create a new wallet that will actually mint the NFTs. You will need the private key of the MetaMask wallet you used to create the contract. To get that, hit the MetaMask icon on your browser, and hit the 3 dots. Select account details and click export private key.
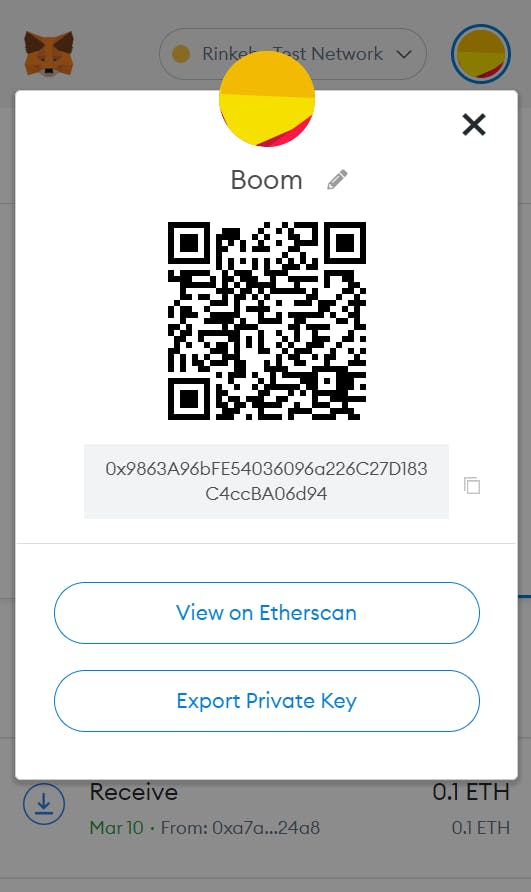
It will ask you to type in your password before it gives you the key. Once you have the key, go to the root directory and create a .env.local file to secure your private key (NEVER GIVE THIS KEY TO ANYONE). Name the environment variable PRIVATE_KEY.
Remember the Alchemy URL I told you to save for later? Well, we need it right now! Create another environment variable called ALCHEMY_URL and set it equal to the URL. Now we can create the wallet as follows:
const wallet = new ethers.Wallet(
  process.env.PRIVATE_KEY as string,
  ethers.getDefaultProvider(process.env.ALCHEMY_URL as string)
);
Before you do anything, RESTART you Next JS server so that it loads the environment variables. You should see this pop up on your terminal:

This creates a new wallet with the Rinkeby test network. We can now create an instance of the Thirdweb SDK with this wallet like this:
const sdk = new ThirdwebSDK(wallet);
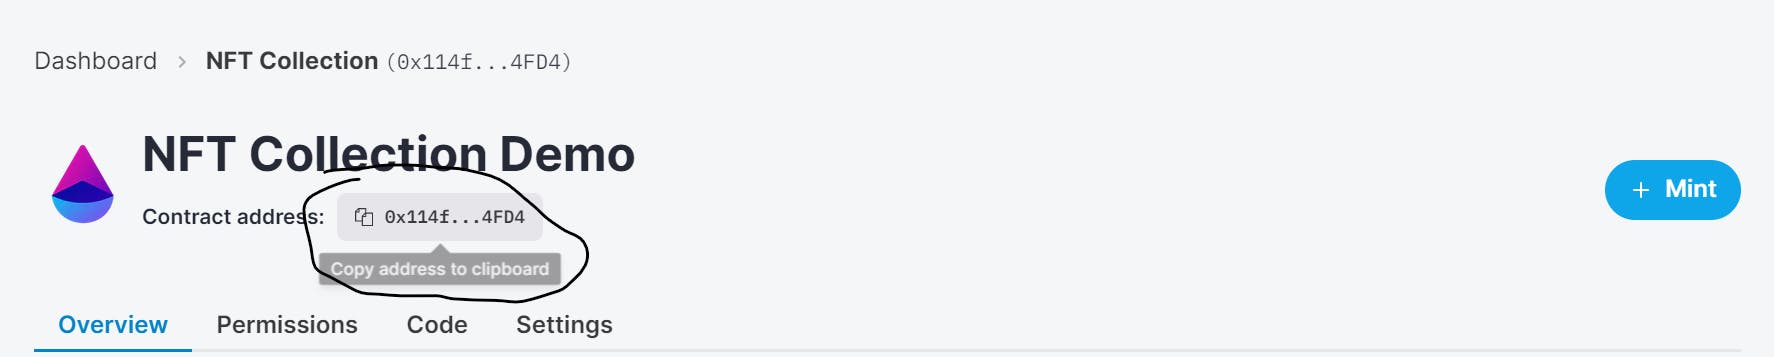
Now to get the specific NFT collection we created, go to the dashboard and copy the contract to your clipboard.
Then we can use the getNFTModule method from the Thirdweb SDK:
const nftModule = sdk.getNFTModule("<contract address here>");
Now we can get to the fun part, minting the NFT! We first need to create the metadata that the NFT will use. I will make the name of the NFT a random 4 digit number. The description will be that it is a cool robot. For the image, I will use the "bottts" art from the Dicebear API. Here is my metadata object (you can make yours whatever you want):
const nftMetadata = {
  name: `#${Math.floor(1000 + Math.random() * 9000)}`,
  description: "Cool Robot",
  image: `https://avatars.dicebear.com/api/bottts/${uuidv4()}.svg`,
};
In the image field, I am calling a function called uuidv4. This will generate a random ID that follows the v4 convention. It is being used as a seed for the robot, so every time a new ID is generated, a completely new robot shows up. You will need to add this import statement at the top:
import { v4 as uuidv4 } from "uuid";
Now to mint the NFT, we can use the mintTo method from the NFT collection, and pass in our metadata. After its done minting, we can send the metadata as JSON to the client saying that we're done minting. We should also catch an error and send that as JSON if the minting fails.
await nftModule
  .mintTo(address, nftMetadata)
  .then(metadata => res.status(200).json(metadata))
  .catch(error => res.status(404).json({ msg: "Error minting NFT", error }));
Now if we press the button and wait (it takes a little bit because they have to take some gas fees), click into your NFT Collection contract on Thirdweb, and boom! You have a new NFT ready to go.

Confirmation
Now as a good UX element, we are going to add a confirmation notification when the NFT has been minted. First, let's import the Toaster and toast functions from the toast library.
import toast, { Toaster } from "react-hot-toast";
Now we can create simple function that toasts the user saying "Minting Successful":
const confirm = () =>
  toast.success("Minting Successful", {
    style: {
      background: "#04111d",
      color: "#fff",
    },
  });
Then we can add a .then() method to our promise in the minting function to call the confirm function:
const mint = async () =>
  await fetch("/api/mint", {
    method: "POST",
    headers: {
      "content-type": "application/json",
    },
    body: JSON.stringify({ address }),
  }).then(() => confirm());
Finally, we can add the actual toaster itself right above the minting button:
<Toaster position="top-center" reverseOrder={false} />
Conclusion
Thirdweb allows you to build web3 apps really fast. It provides powerful SDKs, and it has amazing documentation.I hope you found this article useful, and please share with anyone that needs it. Thanks for reading!
Signing off 👋