

Introduction
Taskmaster is an amazing all-in-one task management tool that will help you keep track of everything in your daily life!
Why Build This?
Todo apps are something many beginners build to start their programming. For some reason, I never had the chance to build one, so I decided that for the Appwrite x Hashnode Hackathon, I'd create one, and I ended up building Taskmaster!
This is also my very first hackathon, so I didn't want to make my project too complex, but Taskmaster has the core functionality of any regular todo app and some extra spicy features as well 🔥
Who Built This?
Yours truly, Rayan 😊
Where is the Code?
The GitHub repo for this project can be found here.
What Tech Did I Use?
For the front end, my main framework of choice was Next JS with the new app router. I used Tailwind CSS for styling (along with components from Headless UI). I also used the Appwrite client SDK for database operations.
I used React Hot Toast for a smooth UX, as every time an action is completed, there is a small notification at the top of the screen.
For authentication, I used NextAuth, which may seem counterintuitive considering that Appwrite has its own auth SDK, but keep reading to figure out why I stuck with NextAuth rather than Appwrite.
For the back end, I used Next JS API route handlers and the Appwrite server SDK for storage operations (creating buckets and files).
App Screenshots
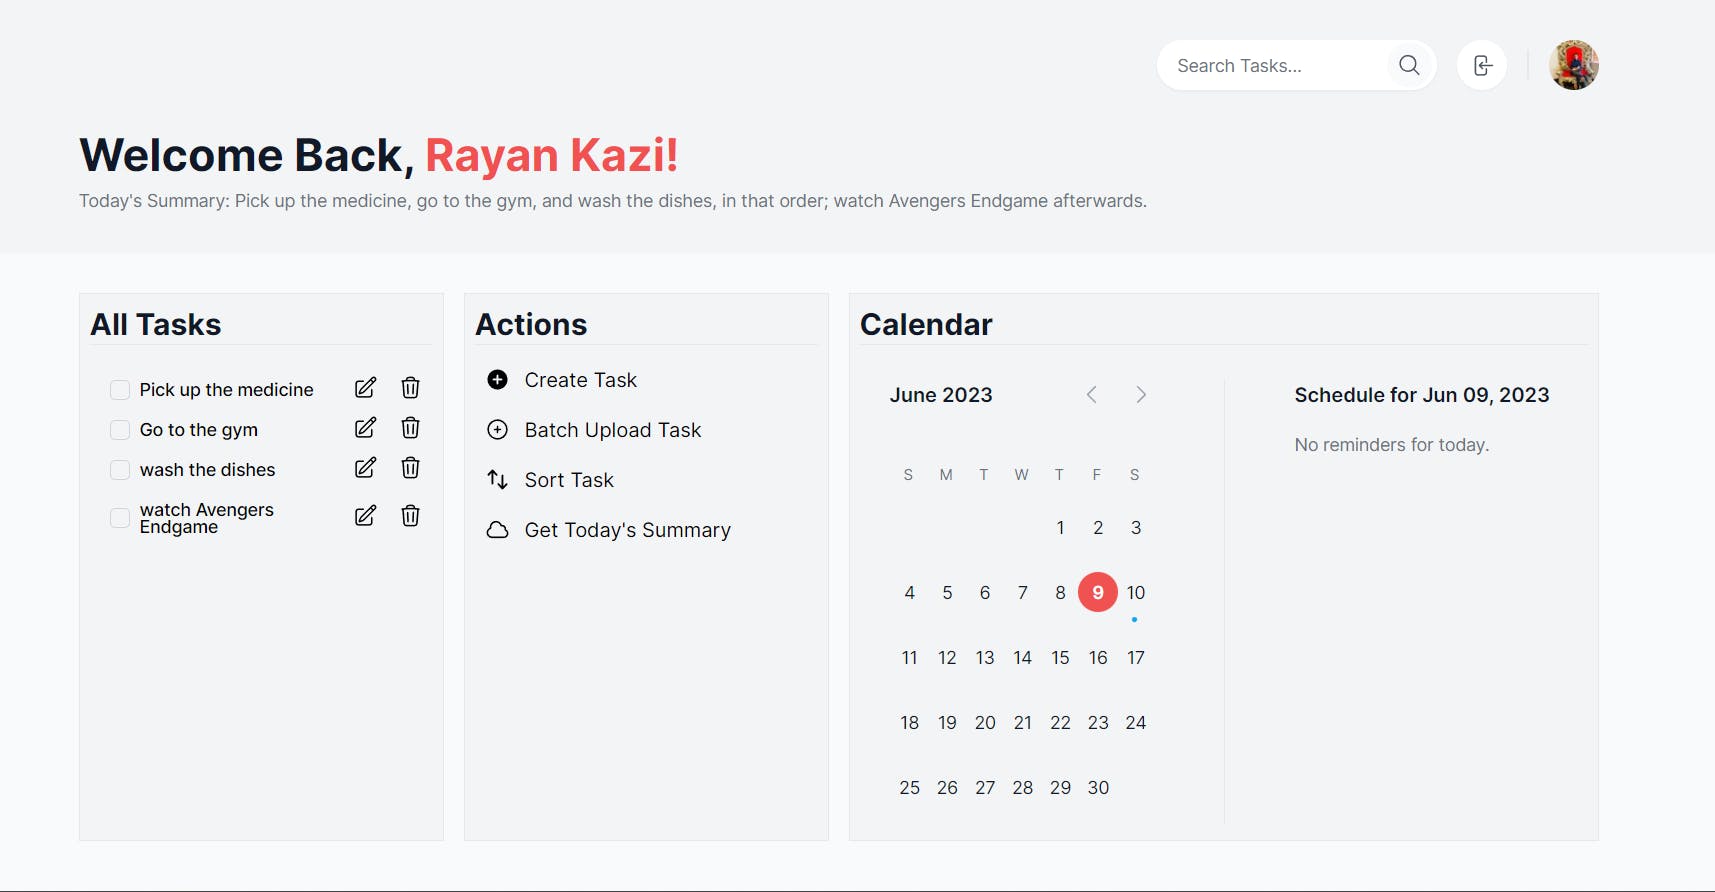
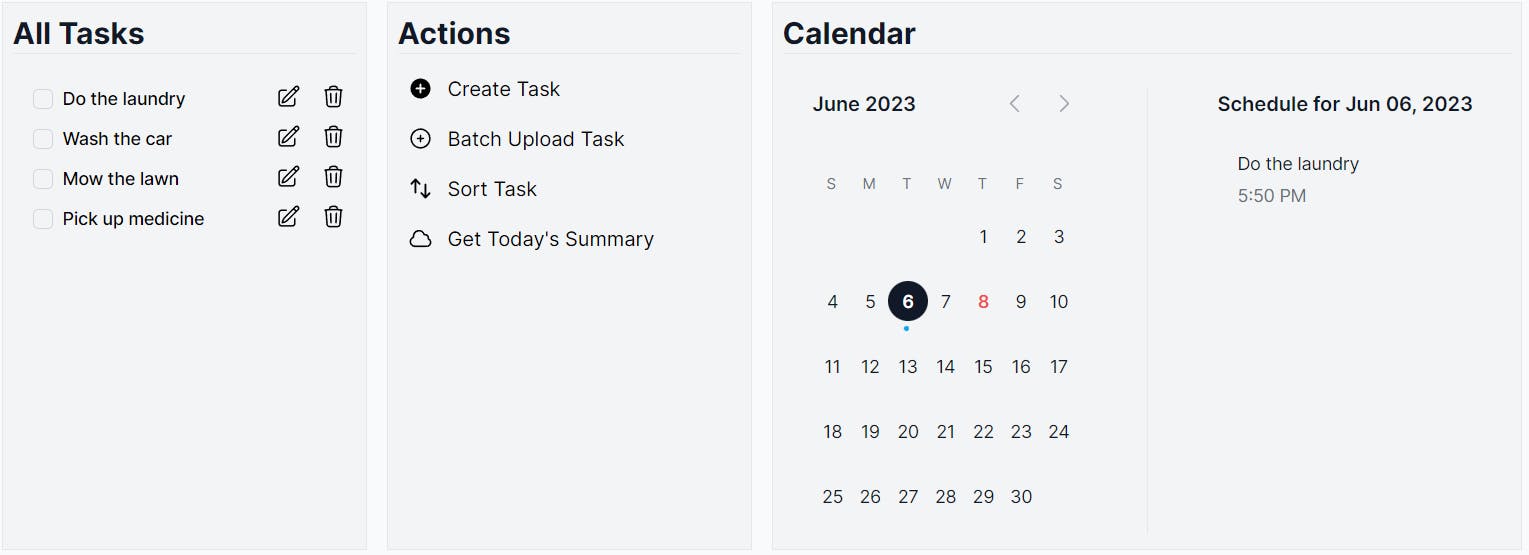
Here is the main dashboard:
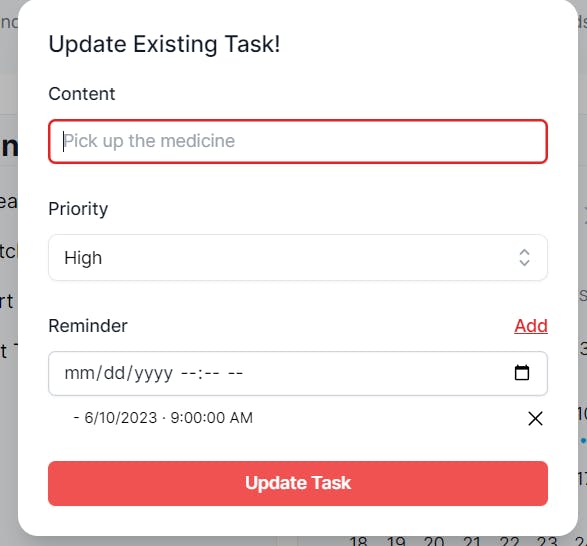
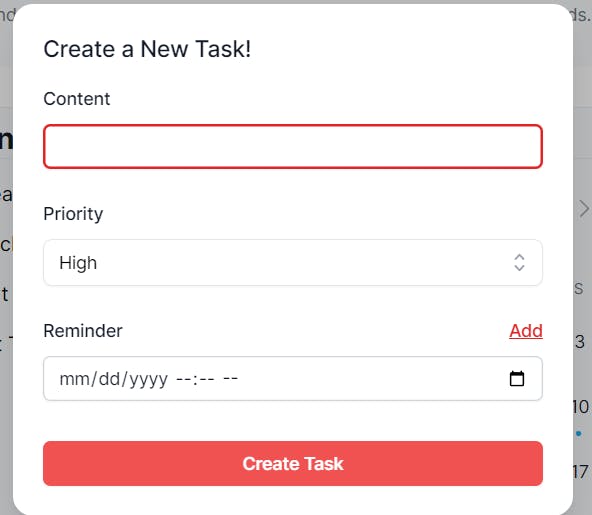
Here are the different dialogs:
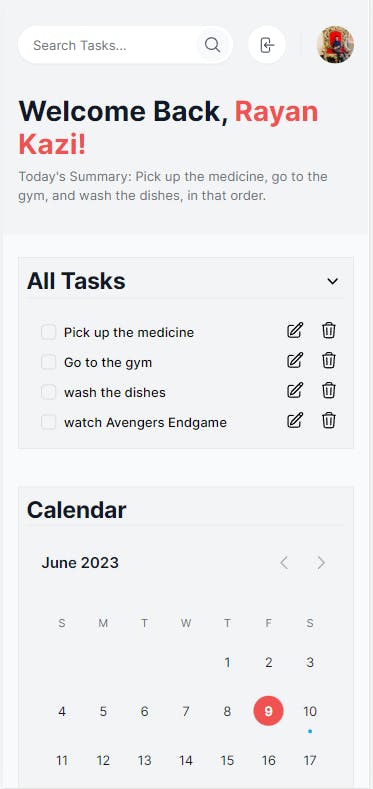
And finally, here is the mobile view of the app:
Features of the App
The painfully obvious feature is that there is full CRUD functionality with the tasks; creating new ones, displaying and updating existing ones, and deleting them as well.
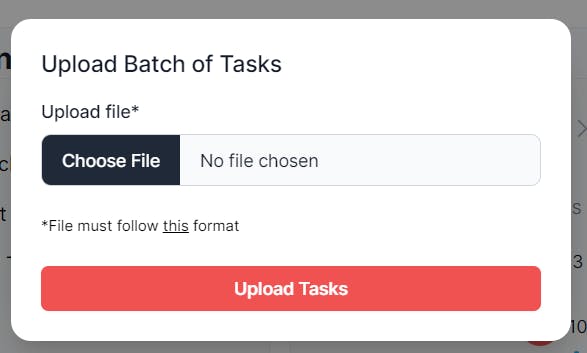
There is also a function to batch upload tasks with a correctly formatted text file (that is available on the website):
High Priority Tasks
- do the dishes
...

Medium Priority Tasks
- wash the car
...

Low Priority Tasks
- go to friend's house
...

if no tasks for certain priortiy:
Medium Priority Tasks
NONE
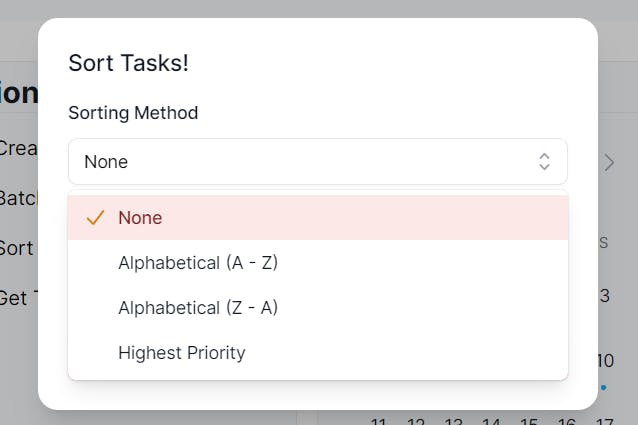
You can also sort the tasks based on alphabetization or by the highest priority (logically speaking that would be high, medium, then low).
Each task can have its own set of reminders that will be displayed on the calendar section as shown:
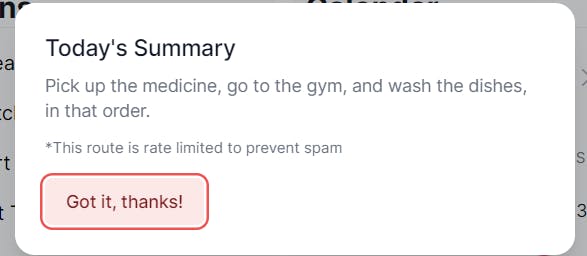
To get on the AI hype train as well, you can press the "Get Today's Summary" button, at which point the app will fetch the OpenAI API to allow an AI to summarize your tasks into a neat concise sentence that can be seen in the header.
To make sure that this function is not abused (and make sure that I still have free OpenAI credits left 🥲), I implemented rate limiting using Upstash's rate-limiting SDK and Redis instance to 5 requests per hour.
For your reference, here are all of the pages and API routes in the Next JS project:
📦app
 ┣ 📂(dashboard)/dashboard
 ┃ ┗ 📜page.tsx   // main page of app
 ┃ ┗ 📜layout.tsx // layout page for dashboard
 ┣ 📂api
 ┃ ┣ 📂ai-input/
 ┃ ┃ ┗ 📜route.ts // get input (all tasks) for the AI summarization
 ┃ ┣ 📂auth/[...nextauth]
 ┃ ┃ ┗ 📜route.ts // nextauth login
 ┃ ┣ 📂storage
 ┃ ┃ ┣ 📂bucket
 ┃ ┃ ┃ ┗ 📜route.ts // create new storage bucket for user
 ┃ ┃ ┣ 📂file // create new file containing user tasks in user bucket
 ┃ ┃ ┃ ┗ 📜route.ts
 ┃ ┣ 📂summarize
 ┃ ┃ ┣ 📜route.ts // fetch Open AI to get AI summary
 ┃ ┣ 📂upload
 ┃ ┃ ┣ 📜route.ts // batch upload tasks from text file
 ┣ 📂auth
 ┃ ┗ 📜page.tsx // login page
 ┣ 📜favicon.ico
 ┣ 📜globals.css
 ┣ 📜layout.tsx // root layout of app
By the way, the app is fully responsive for mobile devices (it would kinda suck if it wasn't ☹️).
How Appwrite Helped Me Build the App
I could have built this app with any other database service like PlanetScale or Supabase. I probably would have had I not participated in this hackathon, but using Appwrite proved to be very beneficial while developing the app, and here's why:
The SDK Is Easy to Work With
Compared to setting up Prisma and PlanetScale, setting up Appwrite was a breeze. All I needed was to create a project on Appwrite cloud, get the environment variables, and instantiate as follows:
export const client = new Client()
  .setProject(env.NEXT_PUBLIC_APPWRITE_PROJECT_ID)
  .setEndpoint(env.NEXT_PUBLIC_APPWRITE_API_ENDPOINT);

export const db = new Databases(client);

export const storage = new Storage(client);
It was surprisingly very easy, and there was hardly any boilerplate. Go Appwrite!
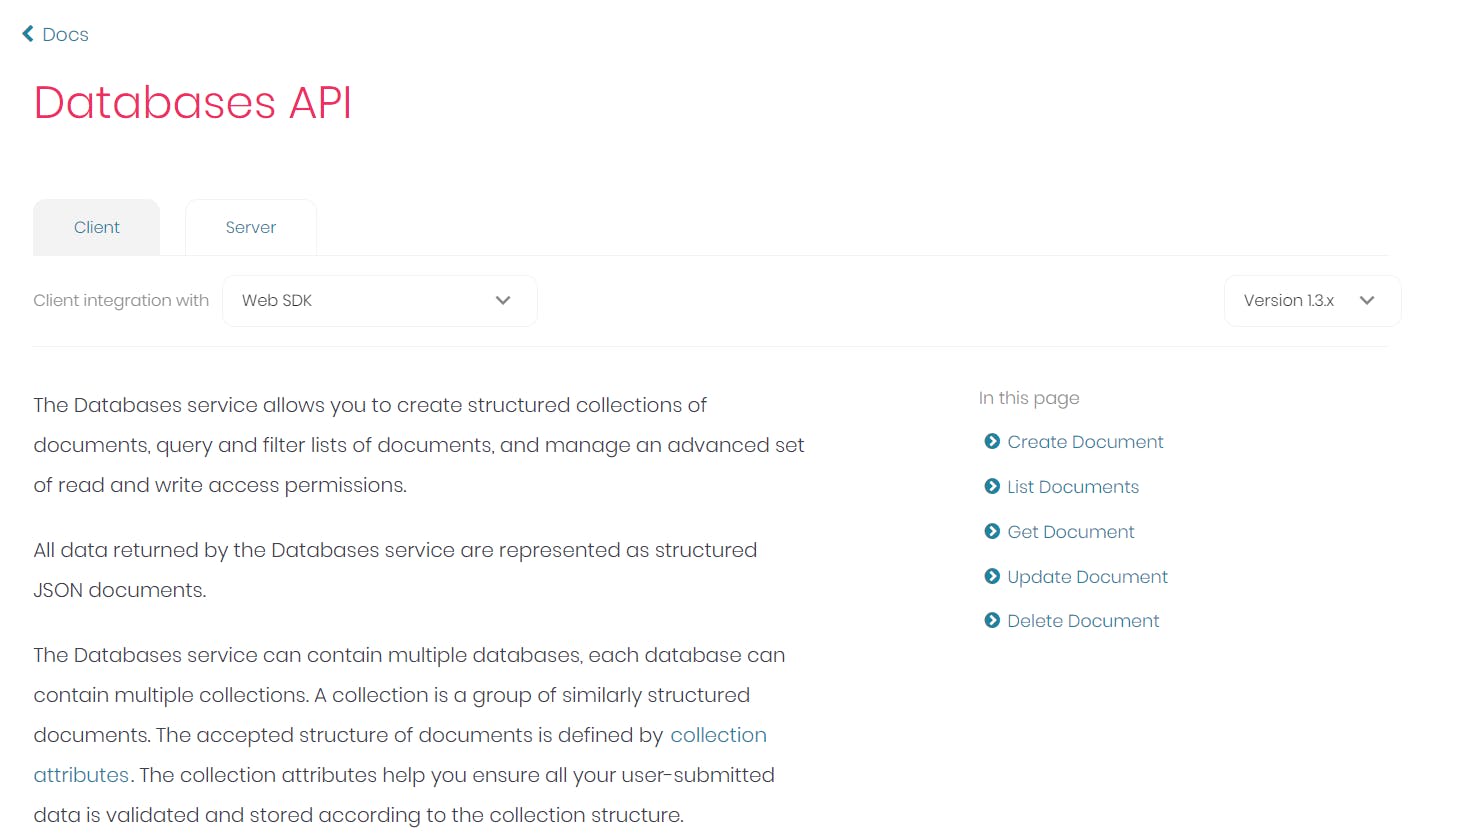
The Documentation Was Easy to Read
The documentation was straightforward and to the point, which greatly aided me in developing and finding errors. All you have to do is Ctrl + F to find docs for each part of the SDK, and voila, you have a list of every single method available:
The SDK is TypeScript Compatible
I switched to using TypeScript a while back, and as of now, I scoff at (am not happy with) libraries that don't have built-in type safety. I was very pleased to figure out the SDK was fully typesafe and autocomplete was working.
The type safety sometimes saved me the hassle of going to the docs because the methods had their types built in. It also allowed me to use Appwrite's built-in types instead of manually creating types for database objects, etc.
Challenges While Building the App
Authentication
This was probably the biggest challenge I had while building the app. Based on what I read from the Appwrite docs, I thought implementing auth using the Appwrite SDK would be pretty easy, but I was proven wrong very quickly.
The main problem I had was with the user information; it was not persisting reload, and I kept getting the following error:

To try to fix the problem, I went to the Appwrite discord to get help on the issue, and one of the people on the Appwrite team told me that disabling Next JS's SSR functionality might fix the problem.
He explained that the web SDK was only for the client, and SSR frameworks wouldn't work well with the web SDK because you need a session on the client and the server.
Unfortunately, I used SSR in other parts of my app, so disabling that wasn't viable. Eventually, I had to come to realize that with the time constraints and my sanity at stake, I would need to implement authentication using a different solution.

I went with NextAuth to implement authentication with Google OAuth, as I was familiar with it. With this type of authentication, I differentiated the user's tasks in the database from other users' tasks by attaching their emails to each task.
Designing the Calendar
I am not the best when it comes to UI/UX, so finding a good calendar component was troublesome, to say the least (I am too lazy to design and implement one myself).
All the calendar components I was finding online didn't have the correct functionality I desired (implementing that functionality would mean breaking the library), and I almost decided to scrap the feature entirely, until I found this godsend video:
This author of the video used a paid Tailwind UI calendar component and made it fully functional with the date-fns package and made it fully open-source (with the permission of Tailwind Labs).
Needless to say, I immediately copied and pasted it into my code and modified it to suit my needs 😄.
OpenAI Summarization
My hate for capitalism reached an all-time high while building this app; getting free OpenAI credits was a huge hassle.
When I first opened my OpenAI account a while back, they gave me $18.00 of free credits, which I thought was very generous of them.
I logged back in to get my API credentials for building Taskmaster, and apparently, all of my free credits had expired months ago.

Because of this, I had to create an OpenAI account under my parent's phone number so that I could get some free credits, and it was only worth $5.00! That was quite surprising, considering the $18.00 they gave me.
This issue is the main reason why I added rate-limiting to the summarization API endpoint (I still need free credits for future projects 😵💫). Implementing rate-limiting using an Upstash Redis instance was quite easy, so that was a relief.
Next Steps
I am thinking about adding the following features:
Other modes of authentication
Desktop Notifications for reminders
Improving UI Design
Possibly making a mobile version of the app
Conclusion
Building this app was a big journey and milestone for me, as it was my first time participating in a hackathon, and I look forward to participating in more of these in the future.
In the meantime, you can view Taskmaster here and the source code here.
Thank you so much for reading, and signing off 👋
Find me on Twitter here!